Creating a DevBox
You can run Agile Cloud Manager on either Windows or Linux because we test it on Windows and Ubuntu.
We have standardized an automated process of setting up a Windows DevBox using an AWS EC2 instance, with easy instructions that you can follow on this page.
After you get the standardized EC2 DevBox working, you can subsequently turn your Windows laptop into a DevBox by using the provisioning code in the UserData section of the MyEC2Instance resource in the same CloudFormation template that you will use to create the EC2 DevBox . And you can alternatively create a Linux DevBox by comparing the commands from the Windows provisioning script with the code in this linux provisioning script and this linux artifact expansion script.
The steps for setting up a standardized Windows DevBox are:
- Step One: Create the DevBox
- Step Two: Login to the DevBox
- Step Three: Confirm that acm was added to PATH
Each of these steps is described in detail in the following paragraphs.
Step One: Create the DevBox
Log In To AWS And Set Region
Log in to AWS as a user with sufficient priviledges to create a VPC with networking, security, EC2 instances and KeyPairs.
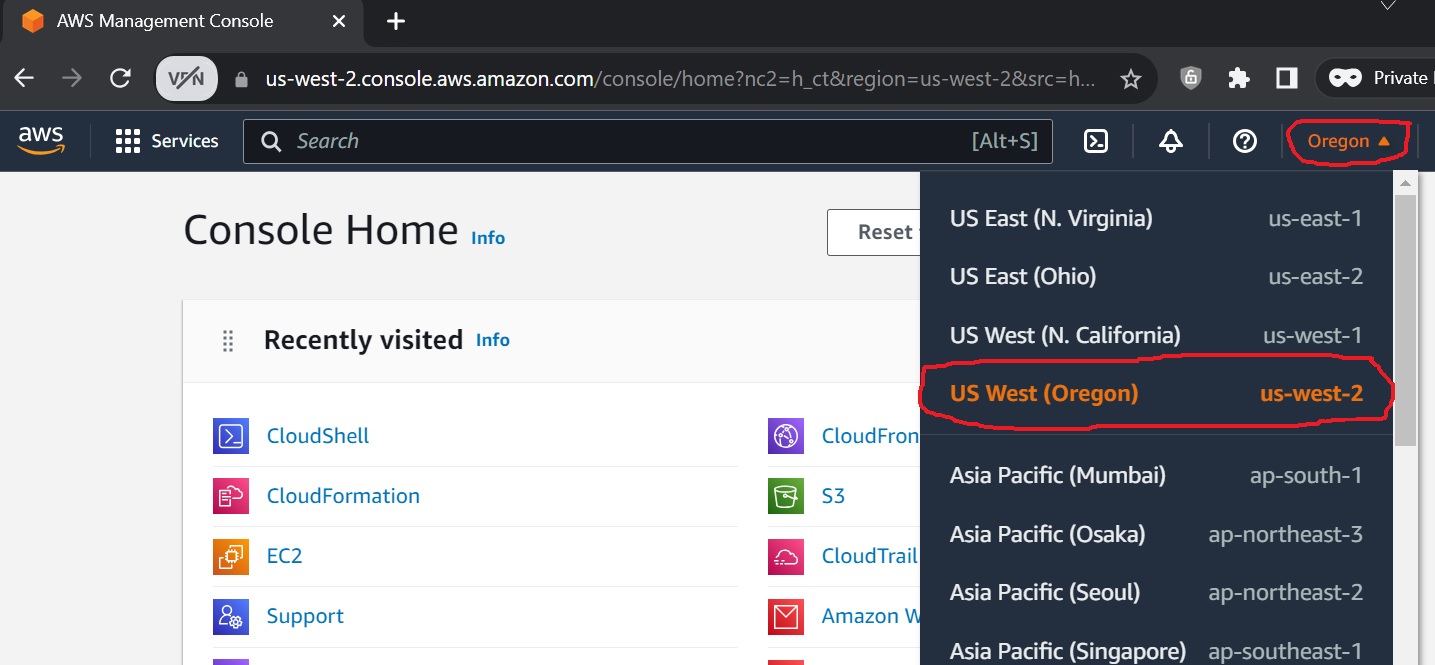
In AWS, set the region to us-west-2 Oregon as shown in the following screen shot.
Work In CloudShell
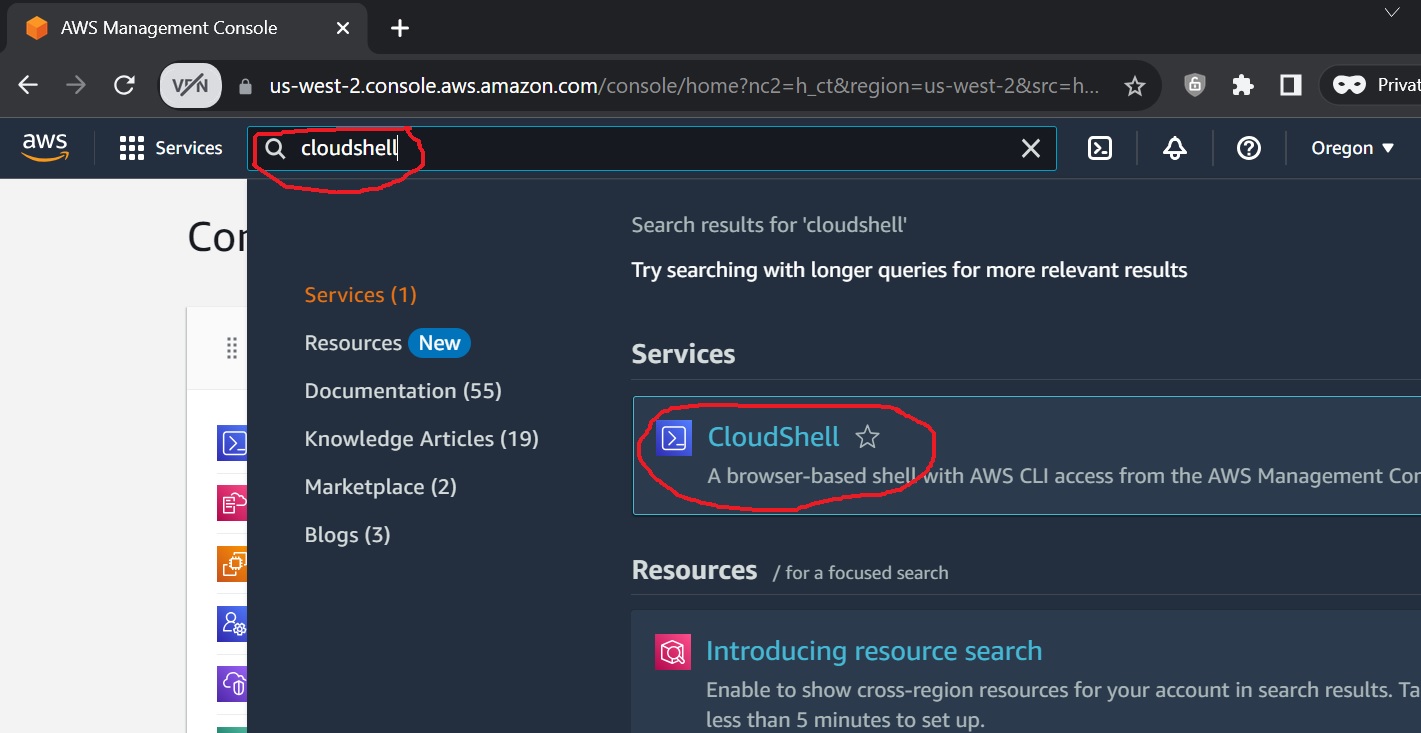
Then open up CloudShell by searching for it in the AWS Services search tool and right clicking it in the results to open up a CloudShell in a new tab as shown in the following screen shot.
Download the acm_devbox_windows_ec2.yaml CloudFormation template by pasting the following command in CloudShell.
wget https://github.com/AgileCloudInstitute/aws-building-blocks/blob/master/cf/acm_devbox_windows_ec2.yaml?raw=true -O acm_devbox_windows_ec2.yaml
Examine contents of cloudshell by running:
ls -al
Template should be present and there should NOT be any MyKeyPair.pem in the directory.
Run the acm_devbox_windows.yaml CloudFormation template from CLI.
aws cloudformation create-stack --stack-name acmWindowsDevboxStack --template-body file://acm_devbox_windows_ec2.yaml
Work In CloudFormation
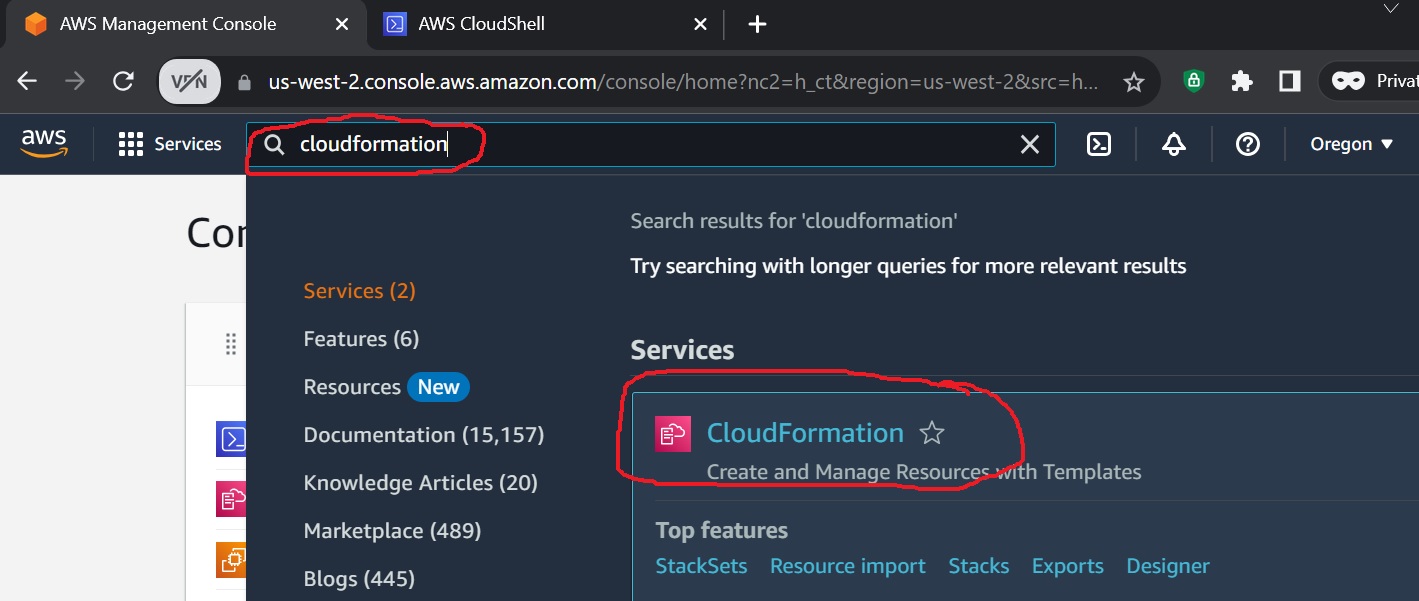
Open the CloudFormation service by going back to the first tab from which you set the region etc above, and this time search for “CloudFormation” in the AWS Services search tool and this time right click on CloudFormation to open the CloudFormation service in yet another new tab as shown in the following screen shot.
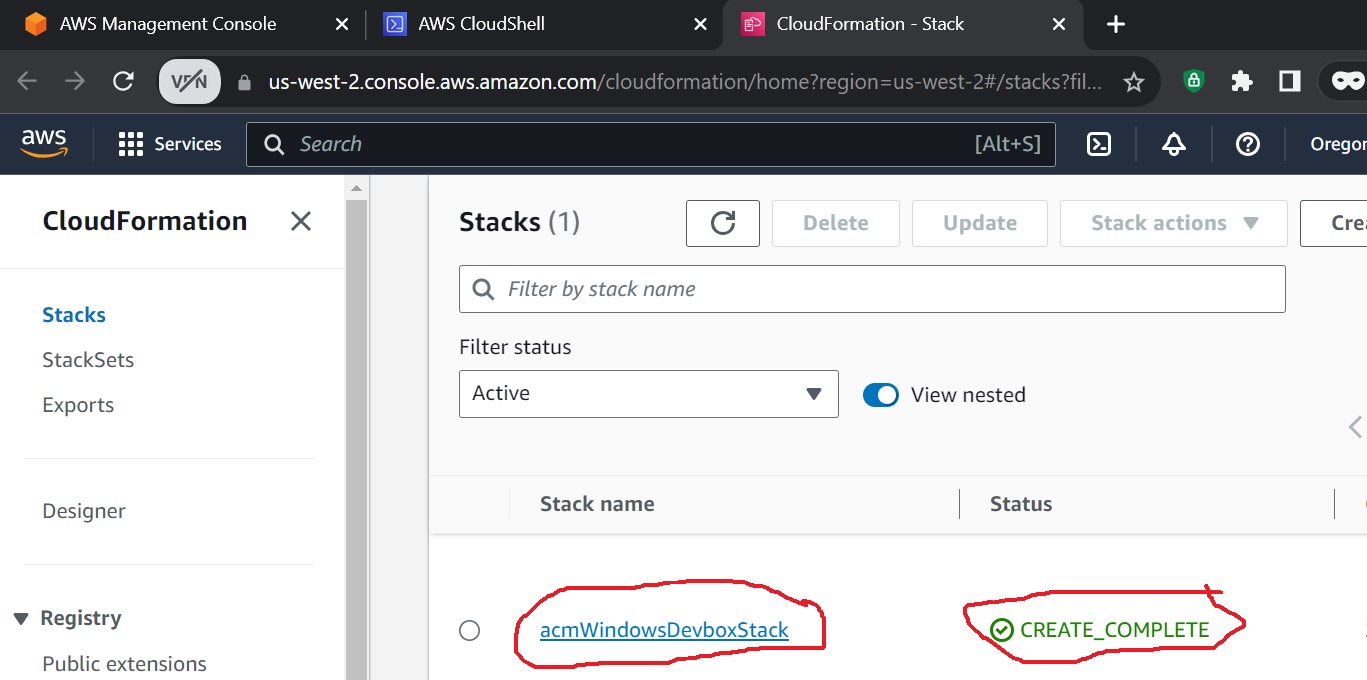
In the resulting CloudFormation service tab, find the acmWindowsDevBox stack and wait until it is in the “CREATE_COMPLETE” state, as shown in the following screen shot.
Get KeyPair In CloudShell
Next, back in the CloudShell service tab, get the id of the key pair by running the following command.
aws ec2 describe-key-pairs --filters Name=key-name,Values=MyKeyPair --query KeyPairs[*].KeyPairId --output text
Paste the result of the preceding command into the following command as the key pair id. For example, if the key pair id were “key-123e4rrrtrt56u7r8” , then the next command you would run would look like:
aws ssm get-parameter --name /ec2/keypair/key-123e4rrrtrt56u7r8 --with-decryption --query Parameter.Value --output text > MyKeyPair.pem
Confirm that the keypair has been downloaded by typing the following command and looking for MyKeyPair.pem in the results:
ls -al
Then open the contents of MyKeyPair.pem with the following cat command:
cat MyKeyPair.pem
-----BEGIN RSA PRIVATE KEY-----
Long-alphanumeric-key-many-lines
Long-alphanumeric-key-many-lines
Long-alphanumeric-key-many-lines
Long-alphanumeric-key-many-lines
Long-alphanumeric-key-many-lines
-----END RSA PRIVATE KEY-----
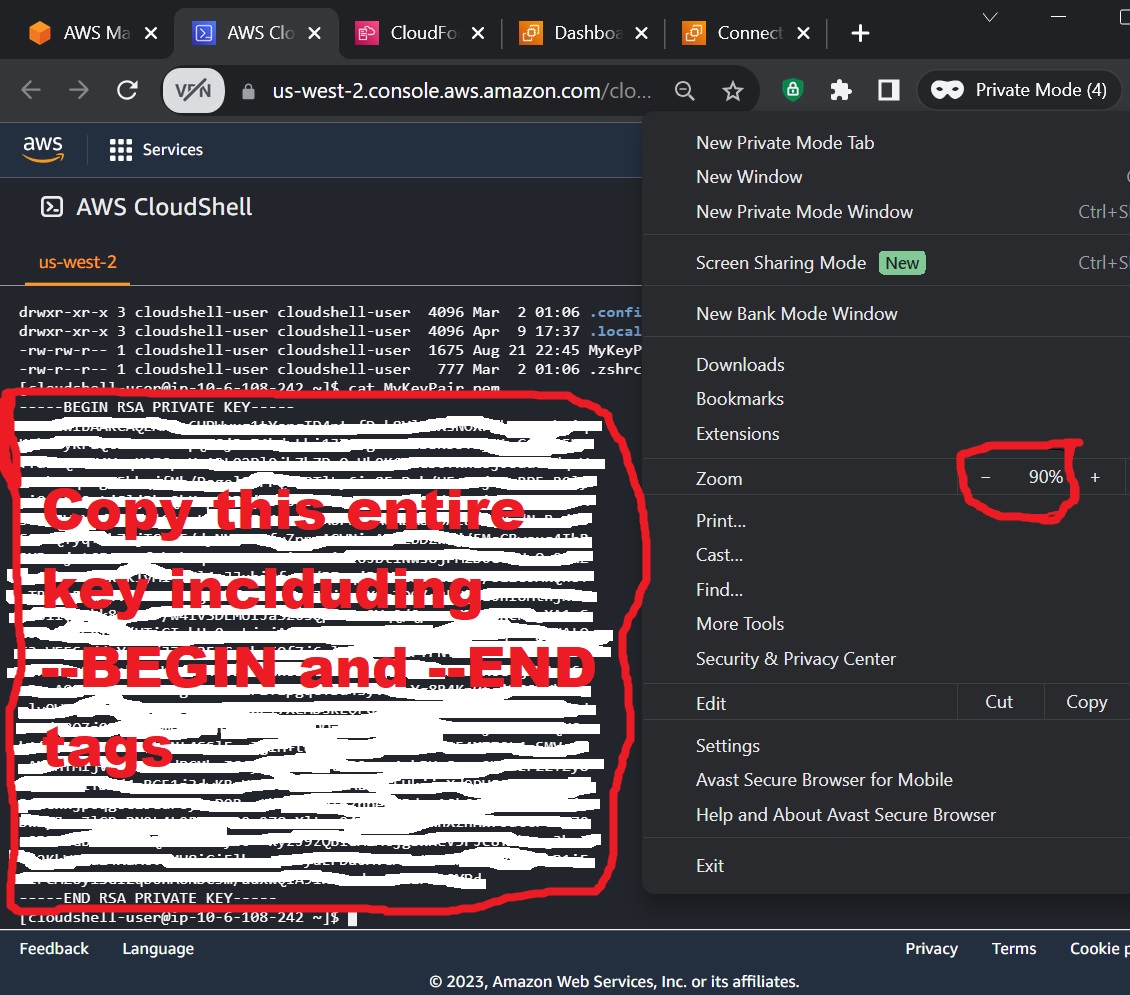
Select the entire contents of the MyKeyPair.pem file, beginning with the -----BEGIN RSA PRIVATE KEY----- line and ending with the -----END RSA PRIVATE KEY----- line. You may need to shrink the size of the window contents in order to reduce the entire contents of the key into the visible window. Copy using Ctrl-C, this will put the contents of the KeyPair into the clipboard. The following screenshot shows how to reduce the size of the contents of the browser window and then select the entire key into the clipboard as follows:
Step Two: Login to the DevBox
Navigate To EC2 Instance In AWS Console
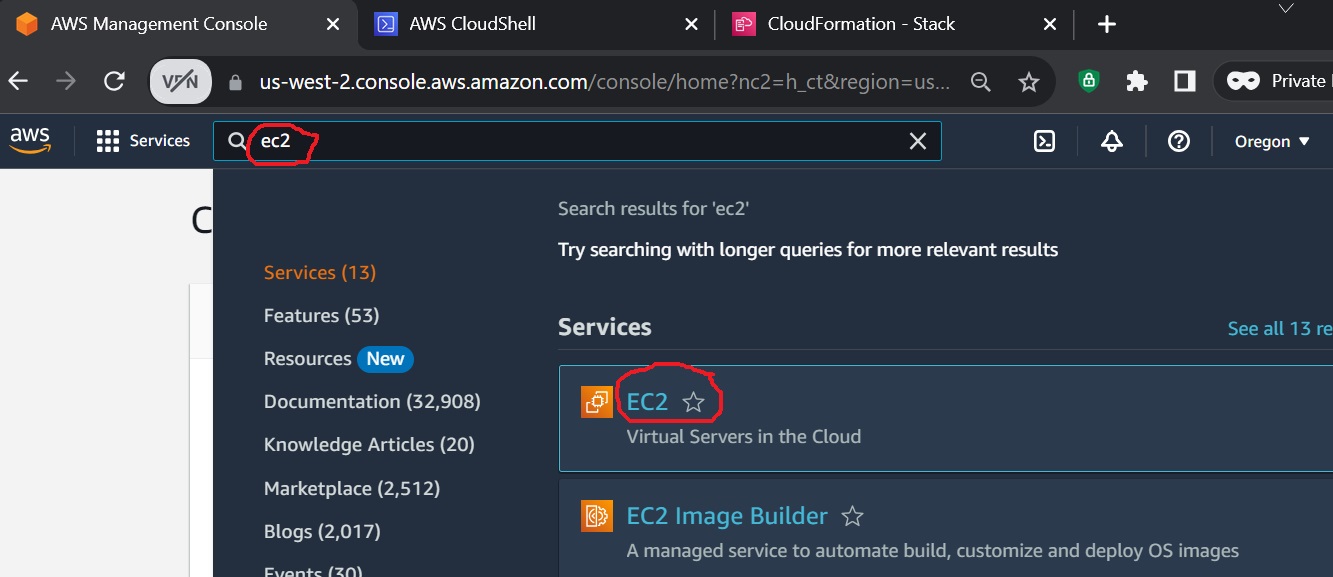
Back in the initial browser tab from which you opened up the other tabs, search for the EC2 service in the AWS Services search tool and right click on it to open a new tab with the EC2 service as shown in the following screen shot.
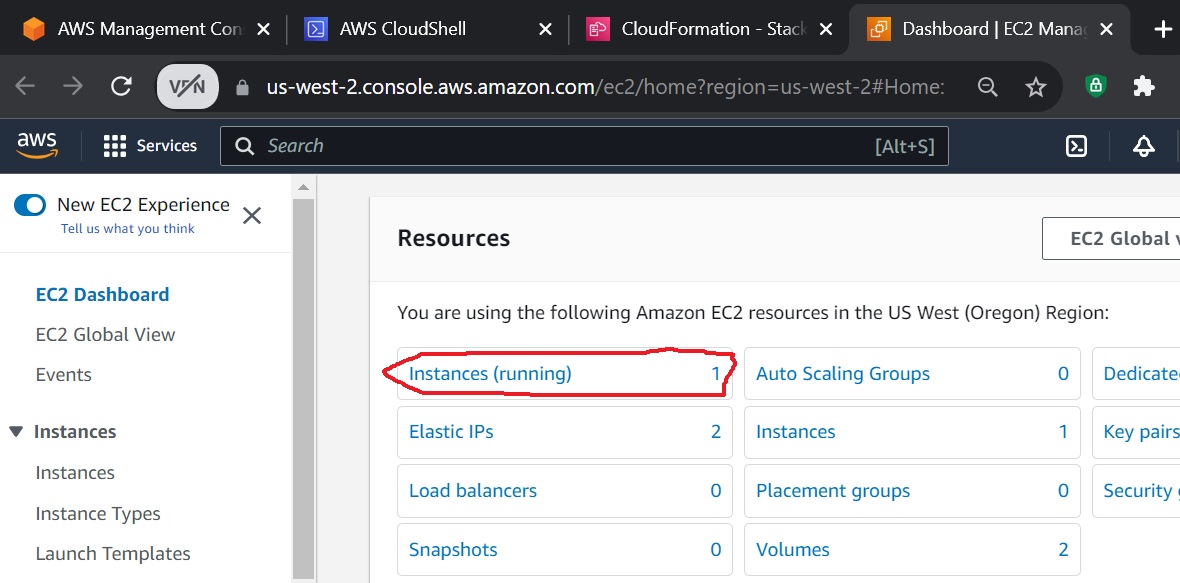
Then, on the resulting EC2 service tab, click on the “instances (running)” button as shown.
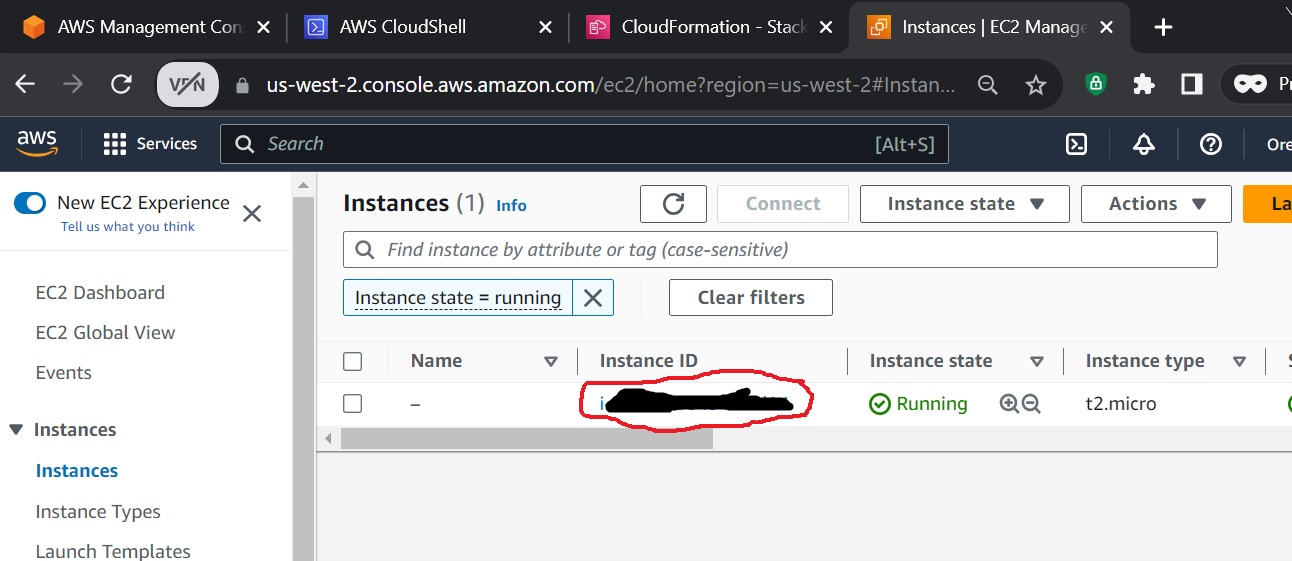
Then, on the resulting list of instances, click on the instance to navigate to the instance as shown in the next screen shot.
Navigate To RDP Client SetUp Tool
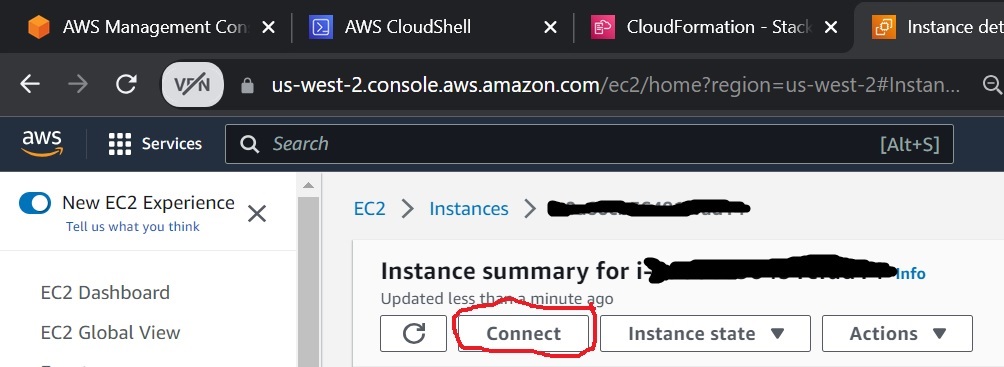
Click on the “Connect” button on the resulting instance detail screen.
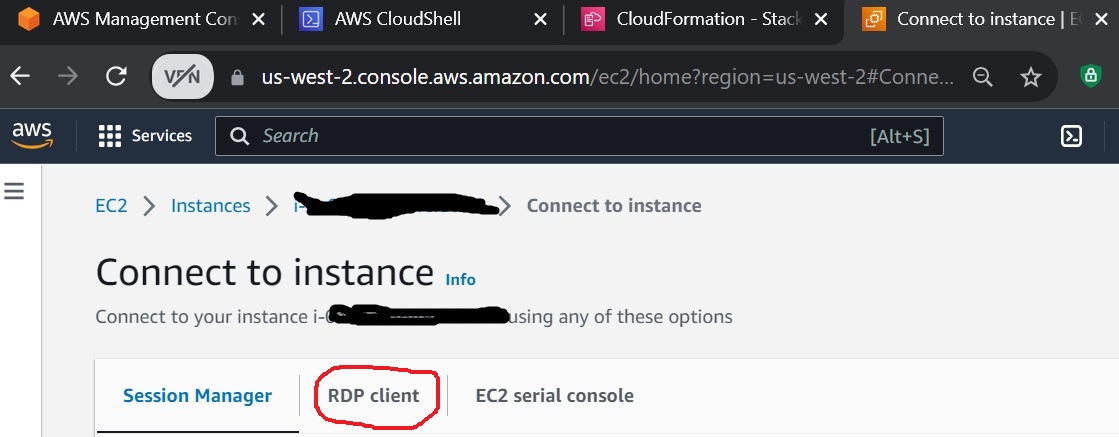
Then click the “RDP client” tab on the connect page.
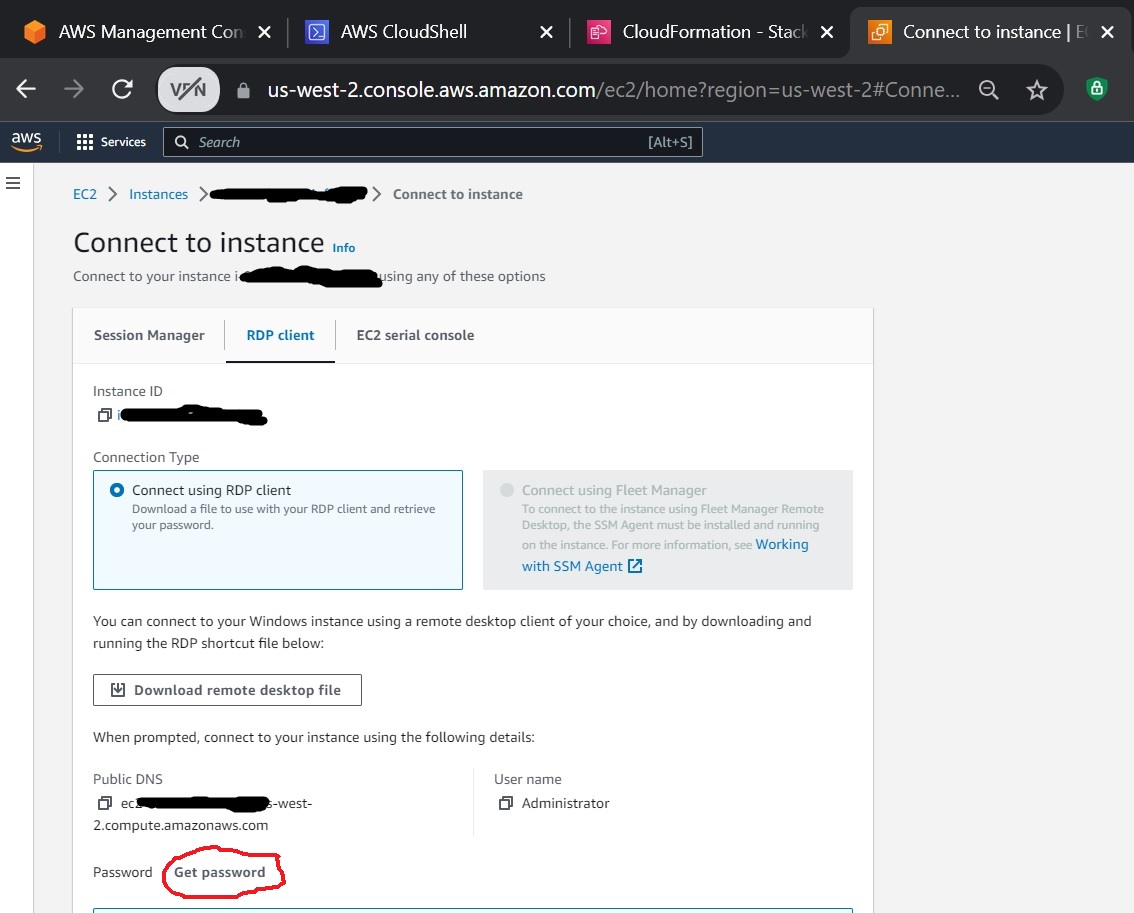
Convert Key Pair Into Password
Click on the “Get Password” link on the resulting screen.
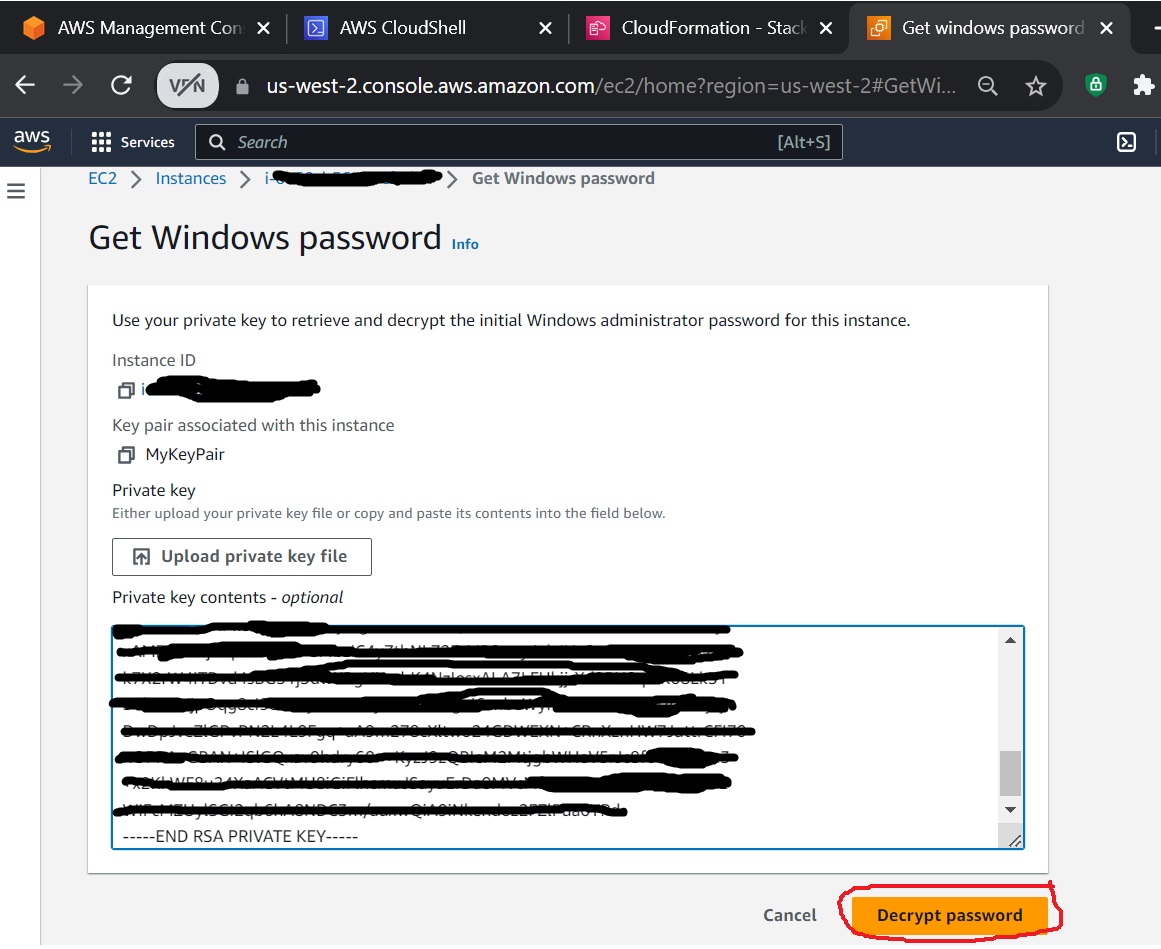
Paste the contents of the MyKeyPair.pem from the clipboard by Ctrl-V into the text area that asks for the key pair. Remember, you put the contents of MyKeyPair.pem into the clipboard in a preceding step above. The text area should now contain a multi-line keypair with the first line reading -----BEGIN RSA PRIVATE KEY----- and the last line reading -----END RSA PRIVATE KEY-----.
Click on the “Decrypt Password” button to decrypt the password.
The following screenshot illustrates pasting in the key and then clicking on “Decrypt Password.”
The decrypted password will now be visible on the page you will be directed to. Copy the password to a safe place like a text file where you can have it on hand for subsequent steps.
Download Then Open The RDP File
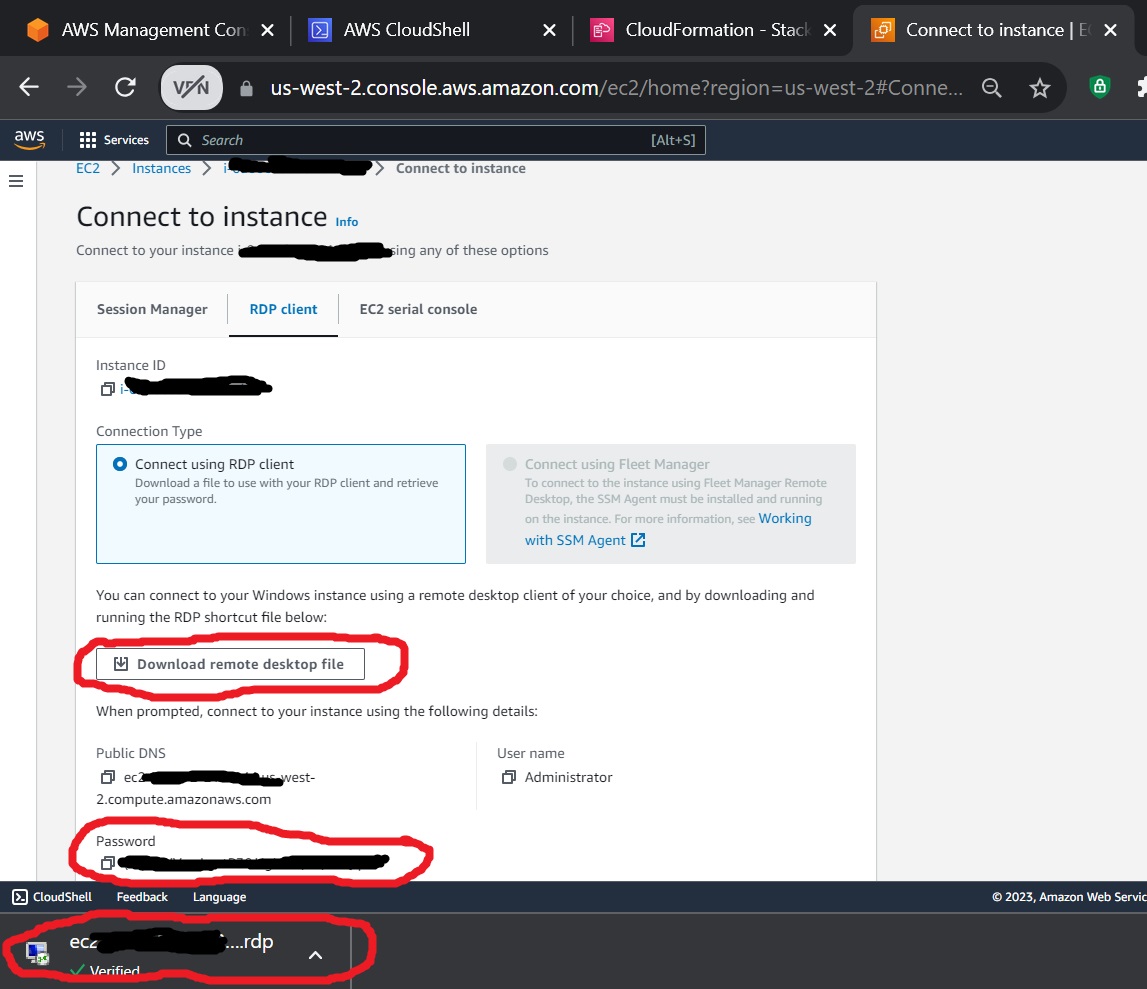
Click on the “Download remote desktop file” button to download the RDP file. Then, after the RDP file has been downloaded, click the new link at bottom to open the RDP file.
The following screen shot illustrates:
- The decrypted password.
- The button to download the RDP file.
- And then the new link at bottom to open the RDP file after it has been downloaded.
Connect Using RDP File
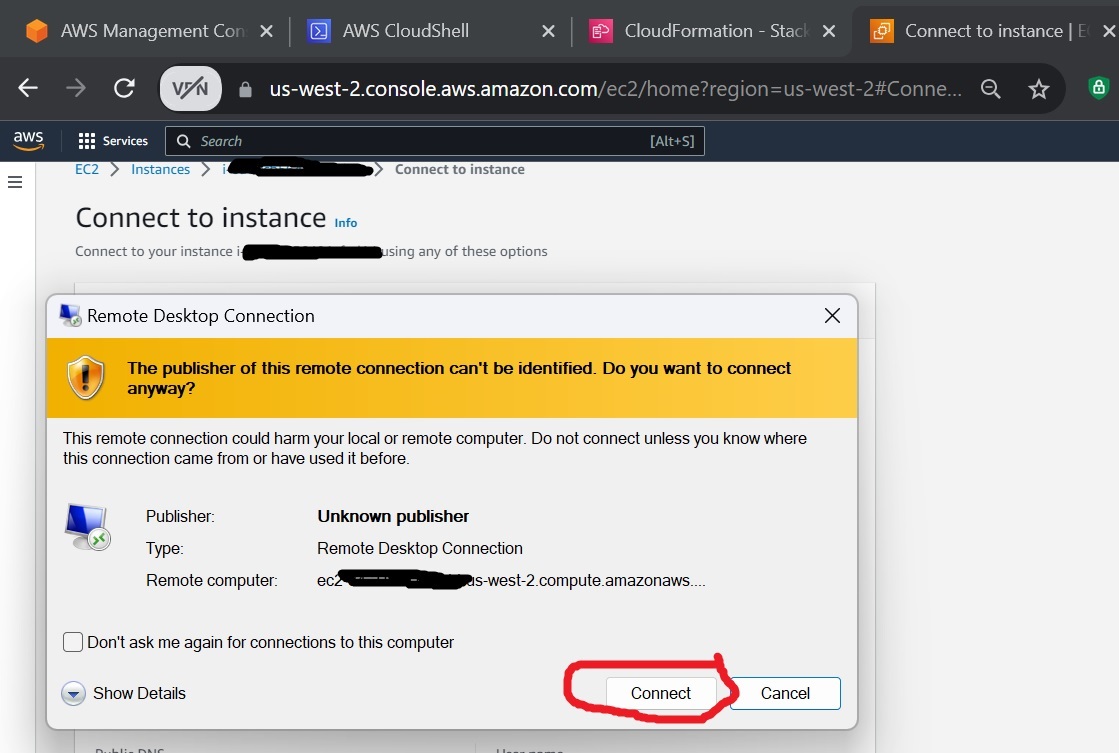
Click “Connect” on the resulting dialog box to log in to the remote desktop of the new DevBox as shown in the following screen shot.
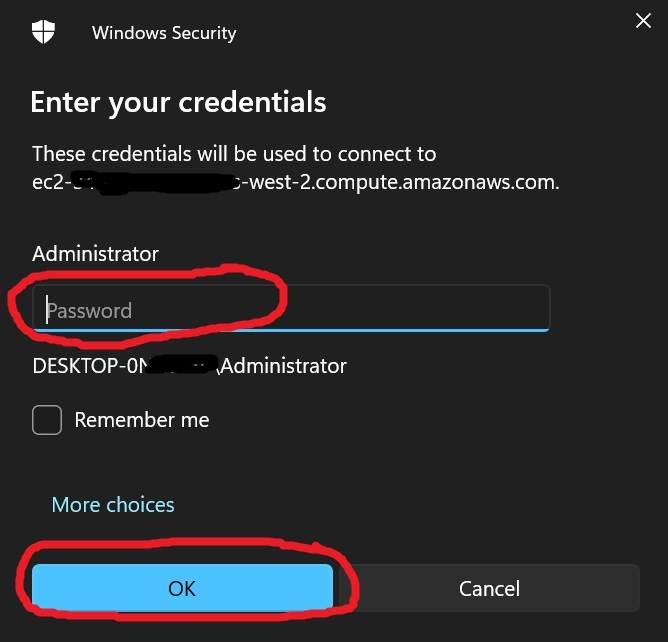
You will need to paste in the password you just decrypted in a preceding step into the login screen shown in the following screen shot.
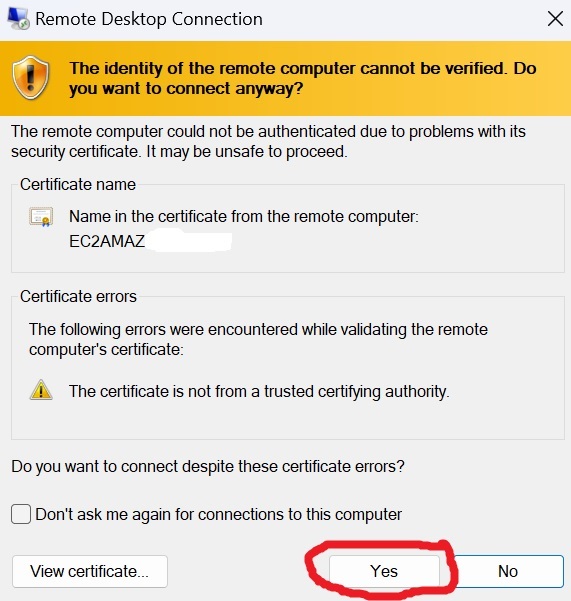
Then click to authorize connection to the new unknown ec2 instance as shown in the following screen shot.
Authorize Discoverability
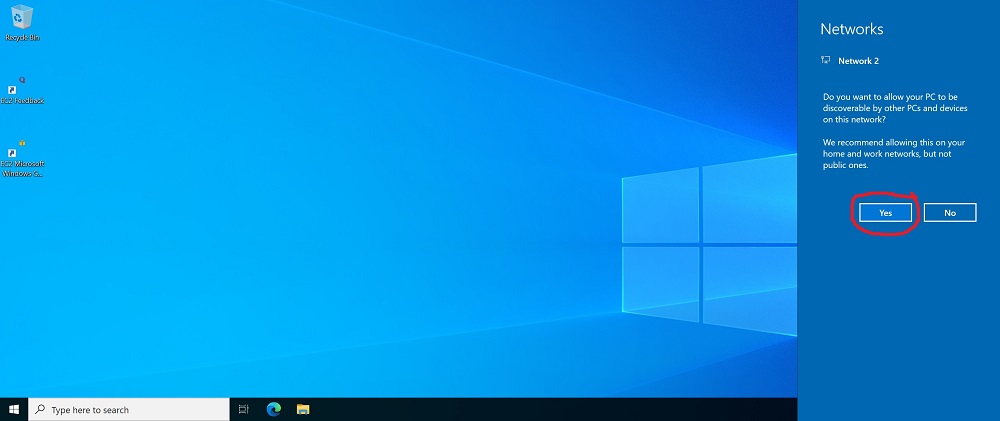
The result will be that you will log in to the Windows desktop of the ec2 devbox that you created with the create-stack cli command above. When a dialog box asks you to authorize allowing the EC2 instance to be discoverable by other computers on the same network, click yes to approve, as shown in the following screen shot taken inside the RDP client.
Step Three: Confirm that acm was added to the PATH of the EC2 instance
The EC2 instance’s UserData startup script installs acm and other required programs.
The t2.micro instance size we are using is part of the AWS free tier, but is somewhat slow and sometimes takes longer to complete tasks than a larger instance size would require.
Therefore, you should check to ensure that acm has finished installing by doing the following:
Open PowerShell as administrator inside the RDP client of the new DevBox and run the following commands in the subsequent sections of this document.
PS C:\Users\Administrator>acm version
1.3
If the result is NOT a valid version such as 1.3 shown in the example above, then try the following:
PS C:\Users\Administrator>$env.PATH
C:\Program Files (x86)\Microsoft SDKs\Azure\CLI2\wbin;C:\Users\Administrator\AppData\Local\Programs\Python\Python311\;C:\Users\Administrator\AppData\Local\Programs\Python\Python311\Scripts\;C:\Program Files\Amazon\AWSCLIV2\;C:\Users\Administrator\acmhome;C:\Windows\system32;C:\Windows;C:\Windows\System32\Wbem;C:\Windows\System32\WindowsPowerShell\v1.0\;C:\Windows\System32\OpenSSH\;C:\Program Files\Amazon\cfn-bootstrap\;C:\Program Files\Git\cmd;C:\Program Files\Git\bin;C:\Users\Administrator\AppData\Local\Programs\Python\Python311\Scripts\;C:\Users\Administrator\AppData\Local\Programs\Python\Python311\;C:\Users\Administrator\AppData\Local\Programs\Python\Launcher\;C:\Users\Administrator\AppData\Local\Microsoft\WindowsApps;
If you find C:\Users\Administrator\acmhome in the PATH output as shown above, then type the following dir command to confirm that acm.exe is among the many contents of the C:\Users\Administrator\acmhome directory.
PS C:\Users\Administrator>dir C:\Users\Administrator\acmhome
…
acm.exe
…
Next, try the acm version command again as follows:
PS C:\Users\Administrator>acm version
1.3
If that still does not work, create a ticket on GitHub and we will gladly help you.
After you have created a working DevBox, you will be ready to run any of the example appliances that you can find in the Marketplace at this link.