Set Up Azure Seed Credentials
The Azure credentials required for keys.yaml and for config.yaml in the four demos of the Agile Cloud Manager can be assembled in the following steps.
STEP ONE: CREATE A SUBSCRIPTION IN AZURE
We recommend that you create a new, dedicated subscription for this demo in order to keep everything clean. You can create a new subscription in the following steps:
Navigate to Subscriptions List
Log into https://portal.azure.com
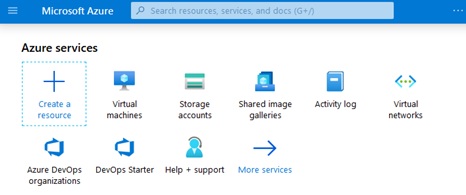
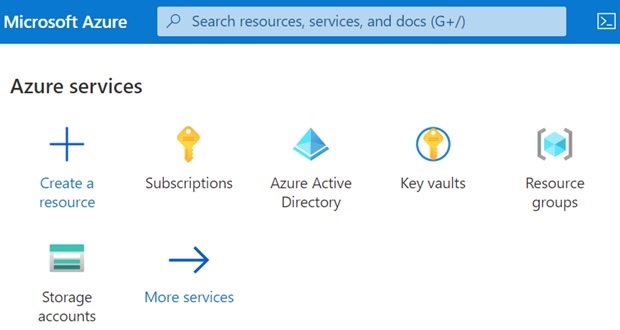
On the main screen that results, click on the “More services” button as shown below:
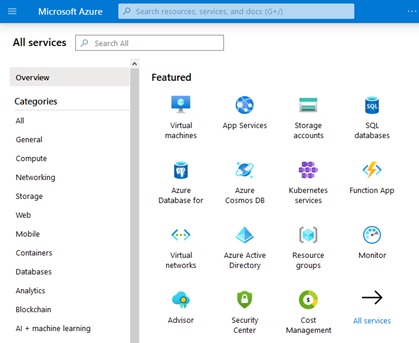
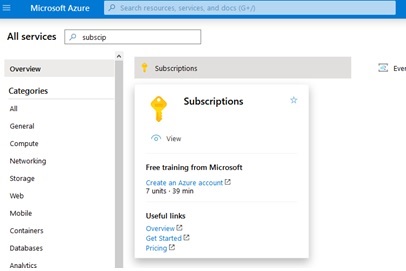
Next, type “subscriptions” in the resulting screen’s search box shown as follows:
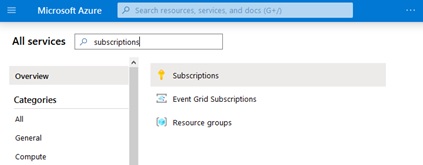
Your search will narrow the list of services to include subscriptions. Click on the “subscriptions” link as sown below:
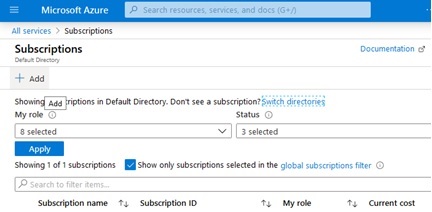
Then on the resulting subscriptions list page, click the “Add” button shown below:
Create a Subscription
On the “Create subscription” page that appears, enter a value for “Subscription name” and click the “Create” button as shown below. The other fields should be automatically completed for you.

The value that you choose for “Subscription Name” will be the same value that you enter into config.yaml as the value for the “subscriptionName” field.
Switch Directories (if necessary) to find new Subscription
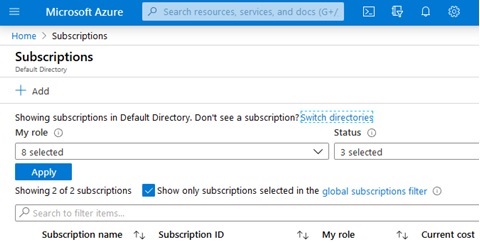
You will automatically be directed to the list of subscriptions, but the subscription you just created might not be on the list. If you do not see your new subscription in the list, click on the “switch directories” link shown below:
This will bring up a pop-up modal showing the “Default subscription filter”, which you must set to include your new subscription, possibly by selecting “All subscriptions” as shown below:
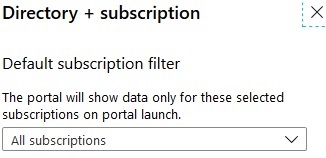
You might need to wait a couple minutes and refresh the page if your new subscription does not work automatically. And you might need to expand the “All subscriptions” drop down shown in the image to confirm that the “Select All” option has been selected to include the newly created subscription which might take a few minutes to appear in the drop down.
You might also need to click on the “global filter” in the list of subscriptions and then UN-check the box on the resulting dialog box that would otherwise limit results to those included in the global filter. The result should replace the global filter with the option that leads to “Subscriptions == all”.
Examine The Subscription You Just Created
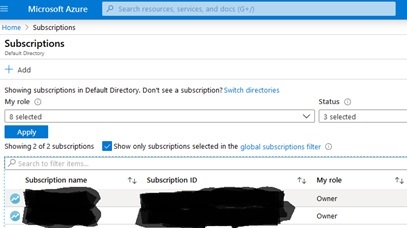
Then, when your new subscription appears on the list of subscriptions page, click on the name of your new subscription to look at its details:
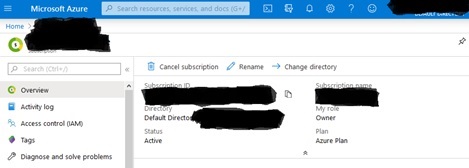
You will automatically be assigned the role of “Owner” of the subscription. There will be no other role assignments. The subscription will automatically be assigned to an Active Directory.
Note which Active Directory has been assigned to the new subscription because you will need to get the ID of that Active Directory in a subsequent step below.
The value for “Subscription ID” on the present page is what you will enter in the subscriptionId field in config.yaml.
STEP TWO: MANUALLY CREATE APP REGISTRATION IN AD
Go to the Azure Portal Home and navigate to “Azure Active Directory” by clicking the link as shown in the following screen shot:
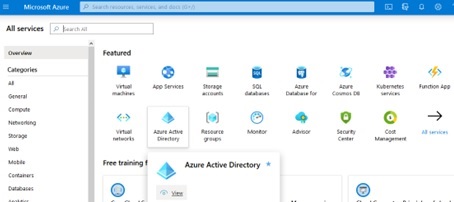
If you are using an Azure account that only has one Active Directory, you will be taken to the “Default Directory” page as shown in the screen shots below. But if your account has more than one Active Directory, make sure to navigate to the Active Directory that is referenced in the Subscription you just created in a previous step.
Once you are in the main page of the Active Directory that is associated with the subscription that you created above, place the value for Tenant ID into the tenantId field of config.yaml. This tenantId should be of the form 456abc12-44jr-987h-cw5k-6w498nfy913g
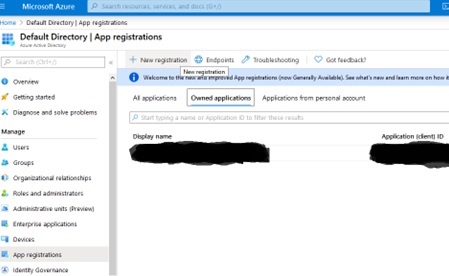
Next, select the “App registrations” option on the left-hand navigation bar and then click the “New Registration” option as shown in the following screen shot, noting that we are combining two steps in this sentence:
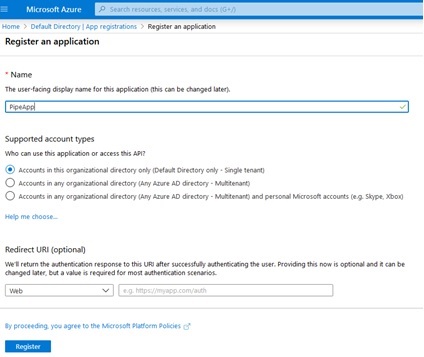
Next, give the app registration a name, then keep the other options and click the “Register” button as shown in this screen shot:
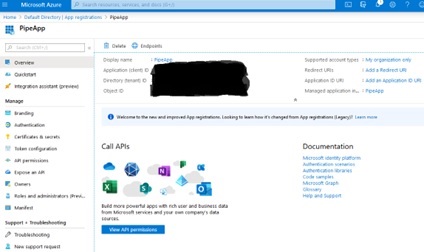
On the resulting screen shown next below, record the “Application ID” value as the value for the clientId field in keys.yaml. And record the “Display Name” as the value for the clientName field in keys.yaml.
Also confirm that the value shown for “Tenant ID” is the same as what you already entered for the tenantId field in keys.yaml:
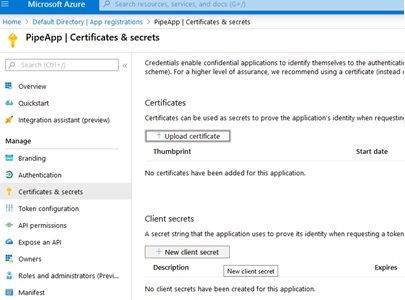
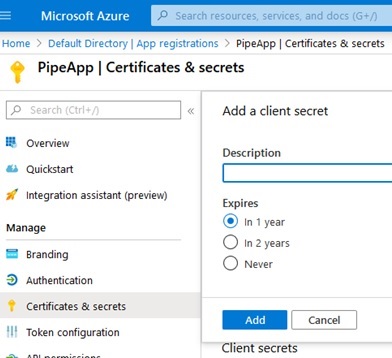
Next, click on the “Certificates & secrets” option on the left-hand navigation panel and click on the “New client secret” option that will appear as shown in this screen shot:
On the resulting modal that will pop-up, click “Add” to confirm, as shown:
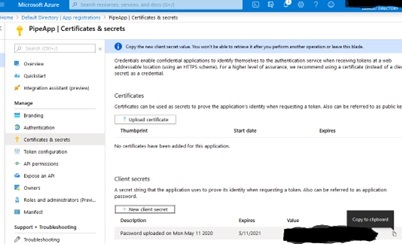
Next, back on the “Certificates & secrets” screen, locate the newly created secret and copy its value to the clientSecret field in keys.yaml:
You are not done yet. This new clientId must be assigned roles as described in subsequent sections.
STEP FOUR: ASSIGN SUBSCRIPTION ROLES TO REGISTERED APP
Navigate to the subscription you are using for this project by navigating to the portal home and searching for “subscription” in the services search box as shown next below. Click on the “Subscriptions” service as shown:
On the resulting list of subscriptions, click on the subscription you are using for this demo, as shown:
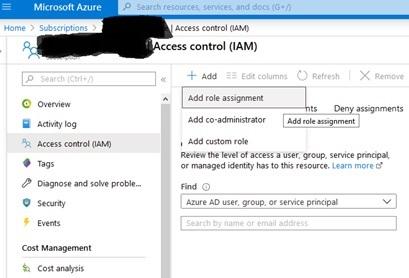
Next, on the detail page for the subscription you are using for this demo, click on the “Access control (IAM)” option on the left-hand menu and then click on the “Add” button on the resulting screen so that you can select “Add role assignment” on the drop-down menu which will appear, as shown in the following screen shot, noting that we are combining two steps into one in this sentence:
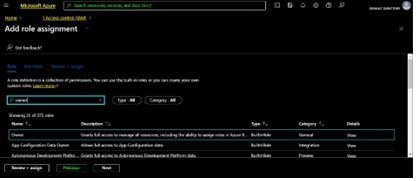
Next, on the “Add role assignment” modal which will appear, type “owner” into the filter menu as shown in the next dialog and click to select the “Owner” role as shown below, making sure that the role you are assigning is the “Subscription Owner”. Then click the “Next” button:
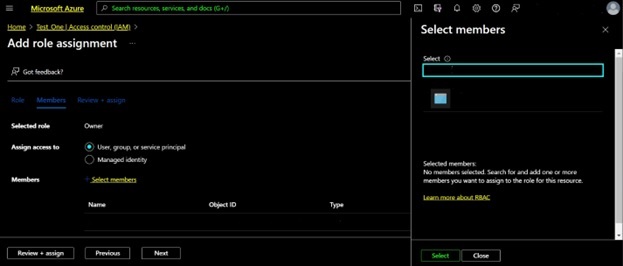
In the resulting screen, click the “Select Members” link shown below and then move your mouse into the “Select Members” modal which will appear at right as shown. Type the name of the app registration that you created above and that you stored as clientName in keys.yaml into the modal’s filter and then select that app registration and click the “Select” button to add the subscription owner role to the app registration that has the same name as the clientName value from keys.yaml as shown in the next screen shot:
After the app registration’s name has appeared in the list of Members in the above screen shot, click on the “Next” button to review the changes that will be made. Then click the “Review+Assign” button, which at this point in the process should simply assign the role.
Note that you can restrict access later by reducing this app’s permission level, but for now during the development phase we are granting access to the entire subscription so that this app registration with the name that you stored as the value for clientName field in keys.yaml can manage automation of this subscription.
You are still not done yet. Next, we assign more roles to the app registration as described in coming paragraphs.
STEP FIVE: ASSIGN AD ROLES TO REGISTERED APP
Navigate to the Active Directory you are using for this project by navigating to the portal home and clicking on the “Active Directory” icon as shown or clicking the “More services” icon to search for “Active Directory” if for some reason “Active Directory” is not given as an option.
Once you have navigated to the Active Directory that has the same tenantId you recorded above, you will need to assign the following two roles to the app registration in the Active Directory:
- Global Administrator of the Active Directory
- Application Administrator of the Active Directory
You can assign the roles one at a time as follows.
Click on the tab labeled “Roles and administrators” on the left-hand navigation pane as shown, and then search for Global Administrator in the search box as shown below.
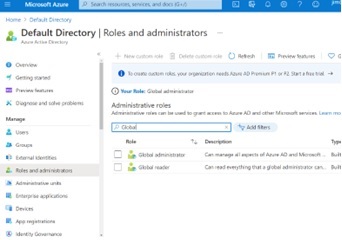
Click on the “Global administrator” role to go to the “Global administrator” role screen. The following image shows what you will successively see as you build out from the “Global administrator” role screen to assign this role to the App registration you created above by performing the following series of actions:
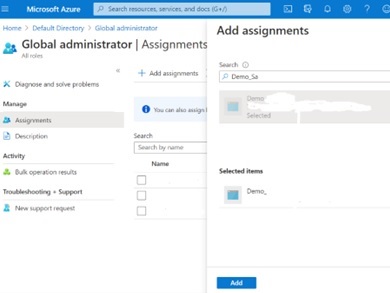
- Then click the “Assignments” tab on the left-hand navigation menu to bring up the Assignments detail page for this role.
- Then click “Add assignments” in the resulting main tab as shown.
- And then search for the name of the App registration that you created earlier.
- Select the App registration you earlier created from the resulting list
- Then click the blue “Add” button after you see your new App registration in the list of “Selected Items” as you can see in the screen shot below.
Now add the “Application administrator” role as follows.
First navigate back to the Active Directory main page and click on the “Roles and administrators” icon on the left-hand navigation panel to reveal the “Roles and administrators” screen, where you type in “Application administrator” in the filter box as shown to isolate the “Application administrator” Built-in role. Then click on the “Application administrator” role.
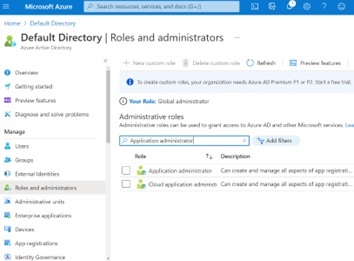
You will be taken to the “Application administrator” role screen, which you will expand in the following steps.
- First, click on the “Assignments” tab on the left-hand panel of the screen.
- Then click the “Add assignments” tab shown on the resulting screen.
- Then in the resulting pop-up modal which you can see at left, search in the search box for the name of the app registration that you created earlier above.
- Then select your app registration so that it appears in the “Selected items” list as shown.
- Once you can see your app registration in the list of “Selected items”, click the blue “Add” button that you see at the bottom right of the screen shot.

Finally, be sure that you have recorded the following information in a safe place that you will need when you resume the Getting Started For Engineers tutorial:
| File Name | Key Name | Value source from above |
|---|---|---|
| config.yaml | subscriptionName | Subscription name |
| config.yaml | subscriptionId | Subscription ID |
| config.yaml | tenantId | Active Directory ID |
| keys.yaml | clientName | App registration name |
| keys.yaml | clientId | Application ID |
| keys.yaml | clientSecret | Application Secret |